Showing posts with label patterns. Show all posts

Monday, January 18, 2016

Wow, it's been how many months?

So life caught up to me. Work and projects got me bogged down, and I simply failed to post anything I made. So, catch up.

My Halloween costume turned out wonderfully, and in good time.

I didn't bone the bodice, but I did manage to make an excellent hat from a thrift store find. I'll try to get better pictures later, but I can at least give you this. (The black cord hanging down the front is my radio. This was taken at work.) I wore this costume all day, through a full shift, then a trip to Burbank for a book talk, and then a long drive home in which I got lost. All told, maybe 15 hours? It held up well, and was comfortable considering.

Next up was the wedding dress I made for a friend.
The entire thing was patterned around a corset I made her previously. It has it's own corset inner structure, attached slip, side closure, and billowing sleeves attached at the wrist to bracelets (a la the X-men character Storm). There's some things I wish I'd done differently, but she was pleased.

And of course after the fanatic sewing of the costume and the dress, I suddenly got the itch for the Edwardian corset I've been craving for over a year. I used the Edwardian corset pattern from Corsets and Crinolines by Janet Arnold
My husband picked out the purple fabric, and I added the green for contrast.
It has black satin binding, and green lace along the bottom.
Normal Posture
Accentuating the S-bend
Large lacing gap, due to delicious Japanese dinner
I cut it too short in the back, and it's a little loose towards the bottom, which I plan to correct with a small pad stitched to the underside to add a little more oomph to my backside. I also need some bust pads to prevent my boobs from slipping down. This corset is meant to be showy enough to be worn as an outer garment, but also an accurate Edwardian corset to wear under proper attire. I do plan to add the garter clips, but I'm going to make them detachable. One thing I don't like about the pattern is that it called for 1/4 in bones next to the lacing. The inner shifts too much and bends too easier. It doesn't feel stable enough. I plan to stick with 1/2 in bones along the lacing for my future corsets. I'll get better pictures of it tomorrow, when I have daylight (and an empty stomach).

Sunday, September 6, 2015

Historical Sew Monthly #8

Also known as the Norwegian skirt of learning.

My mom is 100% Norwegian. Her father and her mother's mother immigrated here. Her heritage has always had a subtle influence on her, in the foods she eats and the way she decorates her house. After taking a social psychology class and doing a report on cultural beliefs and upbringing, I can see the influence in how I was raised beyond just eating lefsa* at Thanksgiving and pulling the batteries out the smoke detector before making krumkake**. I've always had an appreciation of all things Scandinavian, particularly the everyday art like rosemaling and the embroidery inspired by it.

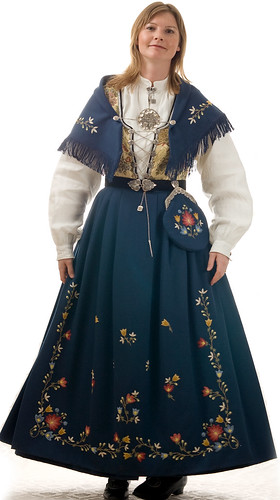
Which is perhaps why I've had a deep passion for the bunad, the Norwegian national costume.

(All images found from simply Googling "bunad")

A few years ago, my Aunt Thelma passed away. I didn't know her (in fact, I'm not sure I ever met her), but I'd always assumed she was one of my maternal grandma's siblings. Grandma came from a large family, so it made sense. My mother was mentioned in Thelma's will, and so a copy of it was sent to her . . . along with a family tree. Thelma was not my grandma's sister, as I'd always supposed. She was the half sister of my grandma's mother, Elise. Apparently my grandma's grandmother was married, widowed, and remarried, resulting in four children total. She also had the most ridiculously awesome name ever: Gunhilde Haldordatter. Gunhilde means "battle maiden" and Haldor is a male name meaning Thor's lightning (datter means daughter, showing linage)***.  With such an amazing name, I've always wondered about her and her life.

I have the clock my grandma's parents got as a wedding gift, and they were married around 1910, I believe. Assuming Elise married at 20, for easy math, that means she was born around 1890, putting Gunhilde as a young adult right through the 1880s using lazy math and assumptions, but it gives me a place to start.

Wikimedia then gave me this:
Christian Krohg - Albertine "to see the police surgeon" created between 1885 - 1887
Ignore all the beautiful bustle era confections going on in this painting, and focus instead on the sad woman being escorted by the police officer into the back, and also on the woman standing on the bench to the far right. Both wear peasant garb, black skirt with or without apron, long sleeve blouse, cross tied shawl, and a head covering. Comparing the waist size and torso shape of the woman with the officer to the fashionable woman in pink, we can tell she is wearing a corset, and is either bustle-less or wearing a very small pad. Her skirt, most similar to what has been copied into the modern bunad, is what I wanted to make. I don't know if this is something Gunhilde ever wore, but it is what I wanted.

Being that are no free patterns for bunads and information on them is extremely limited, I based mine on images around the internet, the fabric requirements from this blog, and this guide for making a dirndl (since they are similer). I used cotton flannel instead of wool, since this was a trial run, and bought 4.5 yards instead of 3.5 because my fabric was narrower. This was my first mistake. That made for far too much skirt and ugly pleating. I also made it for my normal (non-corseted) waist.

I cut off two strips for the waistband, and then cut the rest of the fabric into quarters and sewed the panels together selvage to selvage to make the skirt. (I left a few inches unsewn at the top of one for the opening.) Then I took some gingham remnant I got for a steal and stitched to the waist.
Herringbone stitch to cover raw edges
Modern bunads are cartridge pleated at the back. The gingham with its perfect quarter inch squares became the guide for the pleating.
Up, down, up, down
And pulled tight
The gingham saves you from having to mark the fabric, and provides extra body to the fabric being pleated. The pleating was too deep, and the bottom two rows were removed later. Another problem was not cartridge pleating enough of the fabric. I pleated half of the total skirt, meaning the knife pleats on the front had to be very deep to take up the rest of the fabric. I should have taken another yard at least.

I stitched on the waistband, and was so thoroughly out of love with this project that I will not be hemming it or adding a closure.
From the front (hips!)
Side proves that the woman in the painting wouldn't have needed a bustle pad if the back of the skirt was cartridge pleated.
Close-up of beautiful cartridge pleats
And close-up of ugly knife pleats. The wide box pleat in the front ended up off center because there was sooo much fabric to deal with, and I accidentally put the opening on the right side.

*lefsa is a Norwegian potato tortilla
**krumkake is a crunchy cookie kinda like a pizzelle. I think they taste like a waffle cone.
***Name translations may be wrong, however please don't correct them unless the truth is even more awesome than I believe. :)

The breakdown:
 The Challenge: Heritage and heirlooms

Fabric: 4.5 yards black cotton flannel, black and white cotton gingham
Pattern: My own, based on what information I could find
Year: 1887, but is probably correct for a long range of time periods
Notions: Black cotton thread.
How historically accurate is it? Cotton should be wool, and the hem should have a facing, but it is entirely hand sewn. 60%?
Hours to complete: Somewhere around 20 hours
First worn: Never, and probably never will be, but it was a good learning experience.
Total cost: About $20. The flannel was on sale, the gingham remnant was only about $1 and I had all the thread on hand from other projects.

Thursday, March 5, 2015

Historical Sew Monthly #2 Blue

So Saturday the 28th the only item I hadn't finished for this challenge was my 1915 jacket, which needed buttons and buttonholes. When I got off work I put on the outfit in order to figure out placement, but I was too tired to actually sew. And considering that the Dreamstress is in New Zealand and I'm in California, completing the challenge the day it's due makes it a day late anyways. So I decide to put it off till Sunday.

Sunday goes fine . . . until about 5pm. I'm at work, and I start feeling sick. Just all over weak and crappy. So when I get home, instead of sewing or hanging with friends, I go to bed. I have a fever so I bundle up in blankets with the plan to burn off whatever this bug is. (My husband tells me this is a bad idea, but I do it anyways.)

Monday I am more sick than I have been in YEARS. No real fever, but the kind of weakness and blood pressure drop that means there is a very real possibility of passing out from simply going to the bathroom because it requires me to be upright for a couple of minutes. I am home alone for most of the day, and have to fight to get downstairs to get water and such. I sleep for most of the day. When roommates do get home I get some soup in me, and some Ibuprofen, and start feeling better. Well enough to go to work Tuesday, but not well enough to make it through my whole shift. I spend the day doing some self care.

Today I'm not totally better and am planning on seeing a doctor. But I also realized maybe I should just make my HSM post and not worry about the damn buttons!

tl;dr: I was sick, so here's a post with the jacket still unfinished.

First up, a Renaissance doublet for a Lady Knight! Front

And back. I decided on sleeveless for movement, time, and heat reasons.

Close-up of the front. Her colors are blue and silver, so the doublet is a blue brocade with silver/grey piping and trim. The patterned band is actually a light blue with silver, gold, and black accents. The closures are metal.

Close-up of back. The trims didn't meet perfectly between the upper and the skirt, but it's not super noticeable in person. The whole thing is interlined in canvas, with some wool padding at the shoulders, upper chest, and back. The skirt and shoulder bits are lined in self fabric and the rest is lined in linen.

Inside of doublet.


The breeches are grey wool with black, blue, and silver trims. The patterned band from the doublet makes it's appearance around the legs.
There is braiding at the lower edge of the waistband, and they lace closed. My "points" are bead caps from Michaels, gently folded around the cord with pliers.
Ground photo of the whole outfit. Flash is angry she isn't really in the picture.
Now Flash is just angry cause she has to stand around in a saddle.
And, of course, a mounted photo. The front of the doublet has a tendency to buckle while seated, so I'll be adding some metal bones to it to keep it smooth. Otherwise, a lap around the ranch showed no issues with the outfit.
The Challenge: #2 Blue
Fabric: Upholstery cotton brocade, cotton duck, wool blend scraps, linen
Pattern: Alter Simplicity 4059
Year: late 16th century
Notions: grey piping, grey braid, light blue patterned ribbon, cotton thread, six metal clasps
How historically accurate is it? Probably more Ren Faire than true Renaissance, but I tried to base the design off of surviving pieces. It is machine sewed and the fabric isn't right. Let's say 20%.
Hours to complete: 25?
First worn: Feb 17, when the photos were taken.
Total cost: Some of this was stash, some was purchase. For just the doublet, probably in the realm of $40
Next up, my 1915 skirt. 
When I decided to make a 1915 outfit I knew I had some fabric I could use for a skirt.
The background floral motif isn't super obvious in person, but the stripes are. I drafted a pattern from a guide from 1912, made up the skirt, and voila!
(The stripes are hard to see in the photo, but picture more stripes, less floral). The skirt has a false crossover front, darted waist, side opening, and these buttons:
They're La Mode Vintage buttons, based off a design used from 1900 - 1919.
The Challenge: #2 Blue
Fabric: Striped, floral, blue cotton (possibly a blend)
Pattern: "Side-Fastening" Skirt, from Thornton's International System of Ladies Garment Cutting (1912)
Year: 1912, but the wider skirts hadn't completely replaced the slim ones, and thus should work for 1915
Notions: Cotton thread, four buttons, hook and eye closures.
How historically accurate is it? The pattern of the fabric doesn't work, stripes are fine but not with the floral added, but otherwise it's solid. 85%
Hours to complete: 6-8, from drafting to complete
First worn: Not yet
Total cost: $10? I had to buy buttons and thread, and I think the fabric was a dollar or two a yard when I got it.
And the jacket. When you see the skirt, you think blue. A grey/blue, but blue none the less. But when you're in downtown L.A. trying to match colors for a jacket, you realize that the fabric is too grey to be blue, too brown to be grey, and too blue to be brown. What I finally found was this:
A greyish blue that is the same dusty hue as the skirt, if not a perfect match to the color. I pulled together resources for making the jacket as the instructions are few, but the sew-along was almost no help either (the steps available are 1: marking, 2: pockets, and 4: the pleated collar. And in case you think I misnumbered, step 3 (which I think is the simple collar, the one I was making) was gone. It was frustrating as one of the reasons I close to purchase the pattern was the extra help the sew-along would provide.) My result:
The striped fabric is used for the tops of the pockets, the collar, the cuffs, and the center of the belt.
Side view for awesome sailor collar
The Challenge: #2 Blue
Fabric: Blue-grey quilting cotton, blue striped floral from the skirt
Pattern: Wearing history's 1916 suit jacket 
Year: 1916, but similar jackets were worn a year eariler
Notions: Cotton thread, 7 buttons, hymo interfacing, linen bias tape to bind the seam allowances.
How historically accurate is it? Except for the stripey floral print and the use of hymo as interfacing, I'd say pretty dang. 90%
Hours to complete: Still not completed, needs button and buttonholes
First worn: Not yet
Total cost: $50, including pattern

Friday, February 20, 2015

Money Spent vs. Sleeve Drafting

My petticoat-corset cover combination is finished. I used my skirt pattern, minus the detail bits, to make the petticoat. Then I used this pattern for a corset cover, and then combined the two.
I added an 8 inch deep ruffle with lace on the hem to the bottom of the petticoat.
Close up of lacy ruffle.
I left off the bust holder part of the corset cover, and instead darted it to fit.
Close up of darts in the fitting stage.
Full length image. Yes I am standing on the edge of the bath tub and grabbing the curtain rod for balance.
Side view.

I stitched down the darts, added lace along the neck and armhole edges, and added a lace yoke around the neck.
Then plackets, buttons, and buttonholes. The result:

I almost have the skirt finished as well, just need to add closures, so I decided last night to start drafting the jacket. Both the skirt and the jacket were to come from here, a tailoring guide from 1912. The skirt was a bit difficult; it didn't state that when it said waist or hip measurement it meant half waist and half hip, so I got about a quarter of the way in when I realized it was too big. Plus, the steps weren't in order, so sometimes it'd tell you to connect dots you haven't drawn yet. Frustrating, but not insurmountable. The jacket, however . . .

The Norfolk Jacket is an exercise in hair pulling. Some of the lines have no measurements, some of the measurements don't correspond to any part of the body as I understand it, and a solid third of the English instructions were cut off so I'm doing my best to guess the French. I was about to sit down and untangle more of the pattern when I remembered, Doesn't Wearing History have a Norfolk-style teens jacket? Yes, yes she does. I was debating the pros and cons of just buying a pattern when it occurred to me that the 1912 Thornton pattern doesn't have sleeves with it. I would need to find and draft sleeves to fit. $10 pattern versus drafting a sleeve pattern for a jacket that'll probably need more mock-ups than it's worth?

Take my money. NOW.

Sunday, September 14, 2014

How to Make a Regency Turban


So I said I was going to make a tutorial, and so I am.

My Regency turban was made for the Historical Sew Fortnightly Challenge: Yellow.

I had issues with this challenge, because like many I don't really like yellow. But I do like plaid, so when I found a not horrible yellow plaid, I figured a turban would build my wardrobe, not take too long, and be something I could actually wear.
Not horrible yellow
 So I spent a little time on Pinterest looking at fashion plates and existents, and found that plaid turbans were a thing.
Found on Historical Sewing
This one was probably the best, but it's obviously a wrap turban and would be hard to do as a solid cap.
Ekaterina Karamzina Benner, by Jean Henri Benner
This one isn't bad, but it's a very different kind of plaid.
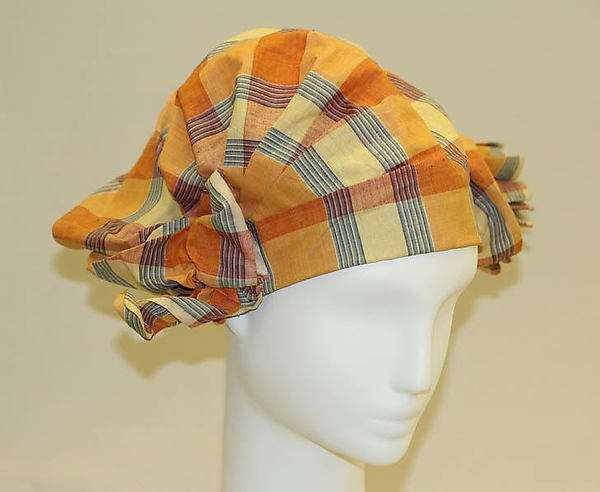
American Evening Turban, 1823, cotton. MET
This seemed like an okay idea, until I saw the back.
Nope.

I tried playing around with my fabric to find a way that would work for me, and I couldn't. The plaid was too loud with nothing to offset it. I continued searching, hoping to find something that would allow me to make a yellow plaid turban, when I discovered this:
Yellow jacket and bag, accented with red. A yellow turban might be out, but a red one, with yellow accents? That's more my style.
The turban on the left in the upper picture and top center in the lower picture served as my main inspiration pieces, and I got to work.

I had a half yard of 54 inch wide burgundy linen to serve as the body of the turban cap. At first I played around with a fully fabric cap,
but realized I was going to need some kind of structure. Dollar Store fedora to the rescue!
I cut off the brim and covered the edge and base with a three inch wide strip of linen. The linen was sewn to the inside, even with the edge, folded over to the outside, and tacked down with running stitches. I also cut off the top to make more room for my dreads. That edge was covered with ribbon, folded over the edge and hand sewn.

Dread space
A circle as wide as the fabric would allow was cut and unevenly gathered onto the cap.
Don't look at the camera. Look anywhere but the camera.
The circle was stitched down unevenly, so it would meet the band edge at the top, but come down to the wearing edge at the bottom.

Next came the plaid bit. I had some cotton quilt batting on hand, so I rolled up a log of it about 2 inches in diameter and long enough to fit around the cap.
Loosely rolled batting
This was stitched together to prevent it from unrolling.
A bias strip of plaid wide enough to go around the log (plus seam allowances) and long enough to cover it with overhang was cut, folded in half lengthwise, and stitched.
Looking closely you can see little hand stitches along the top edge.
This was turned rightside-out

Turning
the batting attached to a large safety pin for ease

and inserted into the plaid tube

Ta-da!
I played around with trims for a while, and finally settled on a brown trim topped with some yellow soutache-like cord.
The trim was pulled tight to cause the plaid tube to puff out in-between, but to avoid looking overly structured it was only stitched together where it met the seam. If you look closely you can see the ends of the white thread where the trim is attached at the seam.

Then some burgundy tassel trim was added where the crown met the brim
and was then completely hidden by the plaid.
I wanted it to peek out like this, but I didn't secure the roll far enough back so the tassel trim became completely hidden. Oh well.
The tube was stitched to hide the seam line all the way around and through all layers.
Trying to let the tassel trim show
There was a casualty.
My needle literally snapped between my fingers as I was trying to maneuver it.
Decorative roll secured, I cut the rest of the linen into 5 inch wide strips
stitching them together into one long tube (so I didn't have to worry about hiding the raw edges), and began playing around.
The bottom of the plaid strip where it extended past the batting was gently knotted, stitched to secure it, and the ends were hemmed. I wanted to have them hang down my back with tassels on the very ends for extra flair.
I still had some of the yellow soutache left, along with some brown cording that matched the trim wrapped around the plaid roll. After a lot of playing around


I finally decided on folding the linen tube in half and braiding it with the two cords. That was tacked on repeatedly until I was happy with the style.


Sorry the pictures are all over, I'm not good at this.

The braid had its center point tacked over the plaid roll, with each end wrapping under the fabric at the back of the head and the ends over each other just behind the plaid roll. This was stitched down here and there, wherever I thought it was necessary (generally wherever I had pinned it during the trying on stage).
Sewing in progress
And stitches nicely hidden. The braid is only stitched to the fabric, not to the structure underneath, to keep it relaxed looking.
The ends of the braid, stitched down on top of one another.
 The extra fabric at the very back
was simply folded over and stitched at the tip.
Please ignore the box of Cheez-its and the raccoon piggy back in the background.

After this more trim was acquired, this time an inch wide yellow upholstery trim. This stitched onto the brim.
And around the point in the back, hiding the cut edges under folds of fabric to make it look continuous.
Next was tassels. The ones I bought were attached to a cord, so first they were freed.
The ends were knotted, the tips of the plaid roll were folded around it, and it was stitched together.


Blurry stitching photo, but you get the idea. The knot gives a nice secure point to stitch around, so I don't have to worry about the cord unravelling.


Brown piping was added around the brim edge, stitched carefully to prevent the thread from showing on the right side.
Flawless
And pearls were added. Lots of faux pearls.
The strands sink into the cap, to give the appearance of wrapping.
Now I just needed something to cover the point of the pearls, and the ends of the braid. After hating everything I had in my jewelry jar, I eventually some winners in my button bin. A metal crescent moon button (the only one I own) was prefect for the top point, and a different button worked to cover the braid ends.
I think maybe the moon should be pointing the other direction, but I'm too lazy to change it.
And the finished project:


And I can shove the dreads in, though the cap looks a little weird when I do.

Though not weirder than period caps, so I think it works. The only extra not pictured is the strip of muslin hemmed and stitched to the inside to hide stitches and the bits.

I didn't really use a pattern for this cap, and I'm not certain of the period accuracy, but it hides my anachronistic hair and I'm happy with it.

For other tutorials that I used to help me (and that you may want to refer to if I was unclear) Festive Attyre did an excellent post on making hers, and Lynn McMasters has a guide to making the padded roll on the turban.

So there you go, a brick of text and photos. Hope it's helpful!